How To Create An Awesome Instagram Video About Sliding Door Installati…
페이지 정보

본문
Sliding Door Installation: A Comprehensive Guide
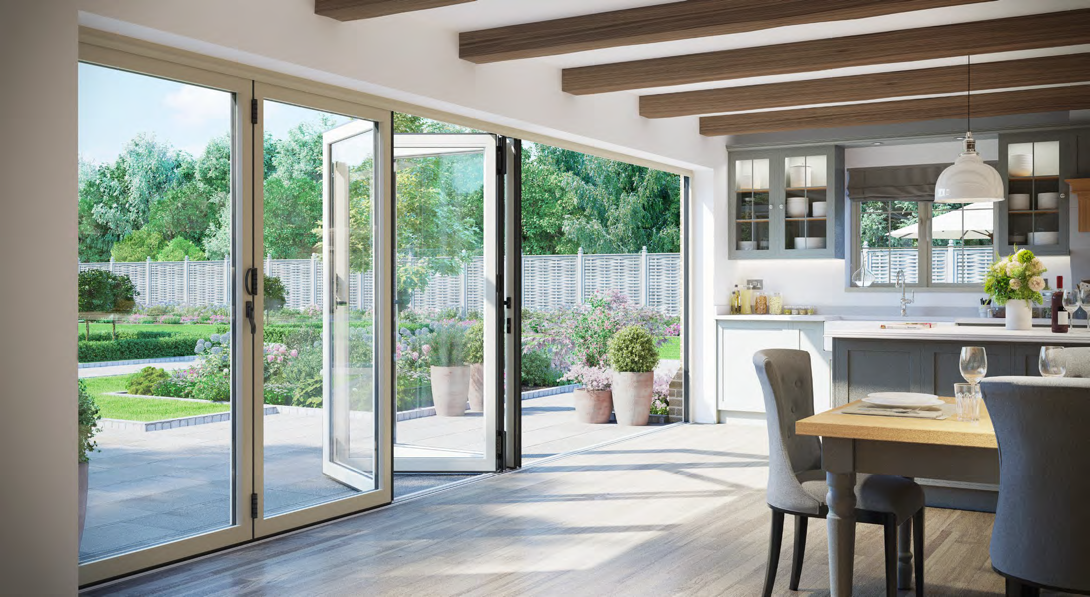
Sliding doors are a popular choice in modern architecture and design, offering a smooth connection between indoor and outside areas while making the most of natural light. Whether for practical or aesthetic reasons, setting up sliding doors can change a living area. This guide supplies thorough details on sliding door installation, consisting of required materials, steps included, troubleshooting tips, and frequently asked questions.
Tabulation
- Introduction to Sliding Doors
- Types of Sliding Doors
- Tools and Materials Needed
- Step-by-Step Sliding Door Installation
- Preparing the Opening
- Setting up the Track
- Hanging the Door
- Changing the Door
- Repairing Common Issues
- FAQs
- Conclusion
1. Intro to Sliding Doors
Sliding doors are versatile and functional, developed to conserve area while improving visual value. These doors run on a track system, enabling them to move effortlessly open and closed without needing substantial clearance. They are typically set up in homes causing patio areas, verandas, and gardens, however can likewise be utilized internally to partition spaces.
2. Types of Sliding Doors
Before diving into installation, it's crucial to understand the various types of sliding doors offered:
- Traditional Sliding Doors: This timeless design includes 2 or more panels that move along a fixed track.
- Bi-Fold Doors: These doors consist of several panels that fold back versus themselves, providing a larger opening.
- Pocket Doors: These are designed to move into the wall, vanishing when open up to conserve space.
- Stacking Doors: Similar to conventional sliding doors, these panels stack on one side for a bigger opening.
3. Tools and Materials Needed
A successful installation starts with the right tools and materials. Here's a list for reference:
Tools:
- Screwdriver
- Determining tape
- Level
- Drill
- Hammer
- Chisel
- Energy knife
- Security glasses
Materials:
- Sliding door kit (including tracks, rollers, and deals with)
- Wood or metal framing (if required)
- Shims
- Caulk
- Insulation (if needed)
4. Step-by-Step Sliding Door Installation
This section supplies a step-by-step guide to setting up a sliding door.
Preparing the Opening
- Step the Opening: Ensure the entrance is square and leveled. Procedure the height and width several times for precision.
- Remove Any Old Doors: Take down existing doors, trim, and frames. Tidy the area to make sure a suitable installation base.
- Confirm Structural Integrity: Check for any broken framing that might need repair before proceeding.
Installing the Track
- Placing the Track: Use a level to mark the position for the track on the top of the door frame or wall. The track should align with the top of the opening.
- Drilling Holes: Drill pilot holes where the screws will be inserted. This avoids the wood from splitting.
- Connect the Track: Secure the track to the wall or framing utilizing suitable screws, ensuring it is even and level.
Hanging the Door
- Attach Rollers to the Door: Following the manufacturer's directions, connect the rollers to the top of the door panel.
- Raise the Door into Place: Tilt the door into position and place the rollers on the track. Make sure the bottom of the door fits well in any directing track or groove.
Changing the Door
- Check Alignment: Open and close the door to assess its motion. It needs to glide smoothly without sticking or scraping.
- Make Adjustments: Adjust the roller height utilizing a screwdriver if needed until the door is properly aligned.
- Seal Edges: Caulk around the edges of the trim and door frame to enhance insulation and avoid drafts.
5. Repairing Common Issues
Even with cautious installation, concerns may develop. Here are some common issues and solutions:
- Door Sticks: This may happen due to misalignment. Check the roller adjustments and straighten the bifold Door specialists as essential.
- Track Issues: If the door jumps off the track, re-examine the installation of the track, guaranteeing it is level.
- Drafts: If there are drafts, check the seals and caulk any openings for better insulation.
6. Frequently asked questions
What is the average cost of installing a sliding door?
The cost can differ considerably based upon materials, labor, and the kind of door selected. Usually, property owners can anticipate to pay anywhere from ₤ 800 to ₤ 2,500 for a total installation.
For how long does it take to install a sliding door?
The installation can normally be finished in a day, assuming no significant structural work is required.

Do I need a license for sliding door installation?
Depending upon local building codes and policies, a license might be needed, particularly for structural modifications. It's advisable to talk to local authorities before starting.
Can I set up a sliding door myself?
Yes, if you have some basic DIY skills and tools, you can set up a sliding door yourself. Nevertheless, employing a professional might make sure much better results, specifically for intricate installations.
7. Conclusion
Setting up a sliding door can improve the functionality and beauty of a home. With careful preparation, the right tools, and a step-by-step technique, house owners can effectively undertake this job themselves. Whether choosing for conventional sliding, bi-fold, or pocket doors, understanding the installation procedure makes sure a high-quality finish that will serve for years to come.
- 이전글10 Quick Tips For Emergency Car Locksmith 25.07.31
- 다음글You'll Never Guess This Home Window Installer's Tricks 25.07.31
댓글목록
등록된 댓글이 없습니다.